
Installation Guide
for Polycarbonate Sheets
From preparation to the final joint, every detail contributes to a well-finished daylighting roof. LIONVINA explains the installation sequence and checks for each type of polycarbonate sheet.
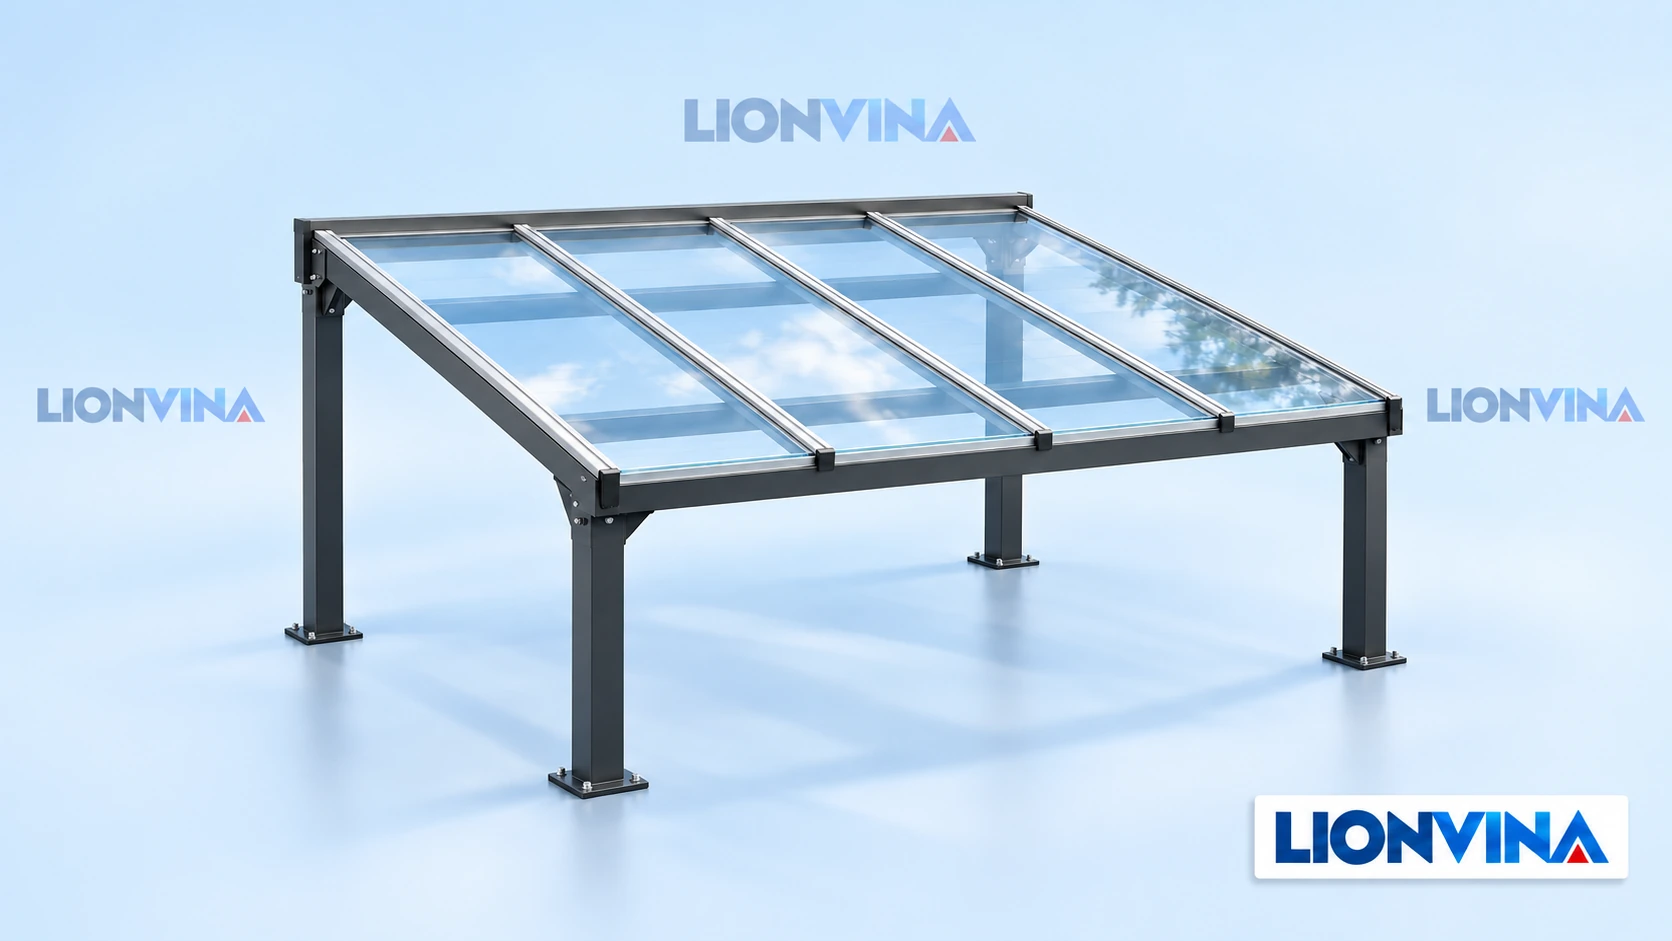
Prepare Materials and the Work Area
Organise the required sheets, accessories and tools by roof area to make installation more convenient.
The Correct Sheet
Record the product code, thickness, sheet structure and UV-protected side according to the batch label.
The Correct Framing System
Confirm support spans, roof slope and fixing construction against the project documents and the exact sheet model's documentation.
The Correct Accessories
Profiles, gaskets, screws and sealants must suit the sheet, thickness and installation method.
- Check quantities, surfaces, sheet edges and labels when receiving materials.
- Store on a flat, clean support, protected from sun and rain; covered storage is preferred.
- Keep the protective film in place during transport and fabrication. Lift sheets rather than dragging them, which can cause scratches.
- Prepare measuring tools, markers, a saw and drill bits suitable for plastics; provide a stable supporting bench.
Select the Guide for Your Sheet
Solid Polycarbonate
Focus on edge retention, joining profiles and expansion gaps.
Read the Solid Sheet Guide →Multiwall Polycarbonate
Check chamber orientation, end tapes and drainage details.
Read the Multiwall Sheet Guide →Corrugated Polycarbonate
Check the profile, overlaps and fixings to purlins.
Read the Corrugated Sheet Guide →Tools and Accessories to Prepare
Organise tools for cutting, drilling, fixing and joint finishing.
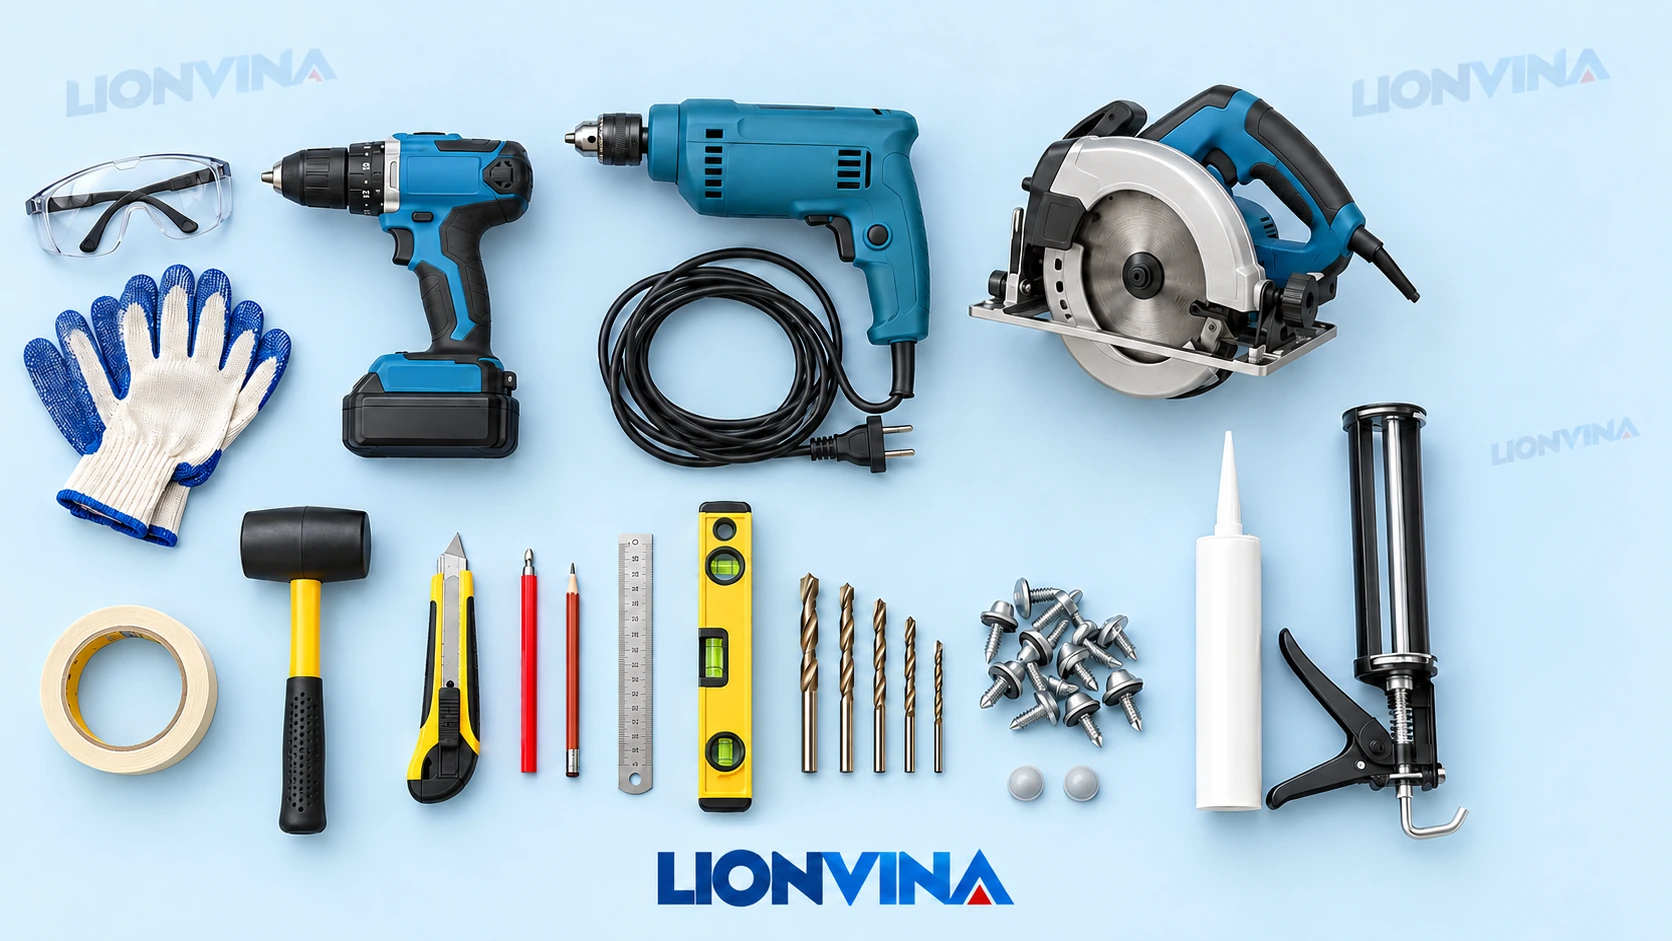
Tools
- Saw and Suitable Blade
- Drill and Screw Gun
- Drill Bits and Driver Bits
- Measuring Tools, Marker and Tape Cutter
- Sealant Gun; Rubber Mallet if Required by the Profile System
Accessories
- Joining and Edge Profile Set
- Gaskets and Sheet End Tapes
- Screws, Washers or Caps Specified for the System
- Compatible Sealant if Specified
Installation in 8 Steps
Follow the sequence and check each step before moving to the next.
Survey and Plan the Sheet Layout
Measure the existing roof, identify drainage direction, joint positions and wall junctions. Plan the sheet layout and accessory system before ordering cut sheets.
Check the Supporting Frame
The frame must be sound, with even, clean supporting surfaces. Check spans, slope and connections against the design; treat any edges that could rub against the sheets.
Identifying the UV-Protected Side
Read the markings on the film or sheet label. For sheets with one-sided UV protection, install the specified side facing outwards towards the sun. Mark it to prevent accidental reversal during fabrication.
Measure, Cut and Clean the Edges
Calculate cutting dimensions and expansion gaps for the installation system. Clamp and support the sheet securely, use a suitable blade and remove burrs and swarf after cutting.
Prepare Sheet Ends and Drilling Positions
Multiwall sheets need clean chambers and end tape treatment. If through-sheet drilling is required, pre-drill holes with the size and edge distance specified by the product instructions.
Position Sheets and Install Profiles
Orient sheets correctly and allow the expansion gaps and edge engagement required by the profile system. Fit the correct gaskets, joining profiles and edge profiles; do not press sheets hard against the frame.
Secure and Complete Weatherproofing
Install screws and washers as specified, tightening just enough for even gasket contact. Finish flashings, ridges, wall junctions and joints with compatible materials.
Remove Film and Complete Final Inspection
Remove the protective film once installation is complete, following the sheet instructions. Clear swarf, check drainage paths and all fixings, and retain roof photographs and material details for handover.
4 Checks Before and During Fabrication
Compare the details below with your selected sheets, profiles and framing plan.
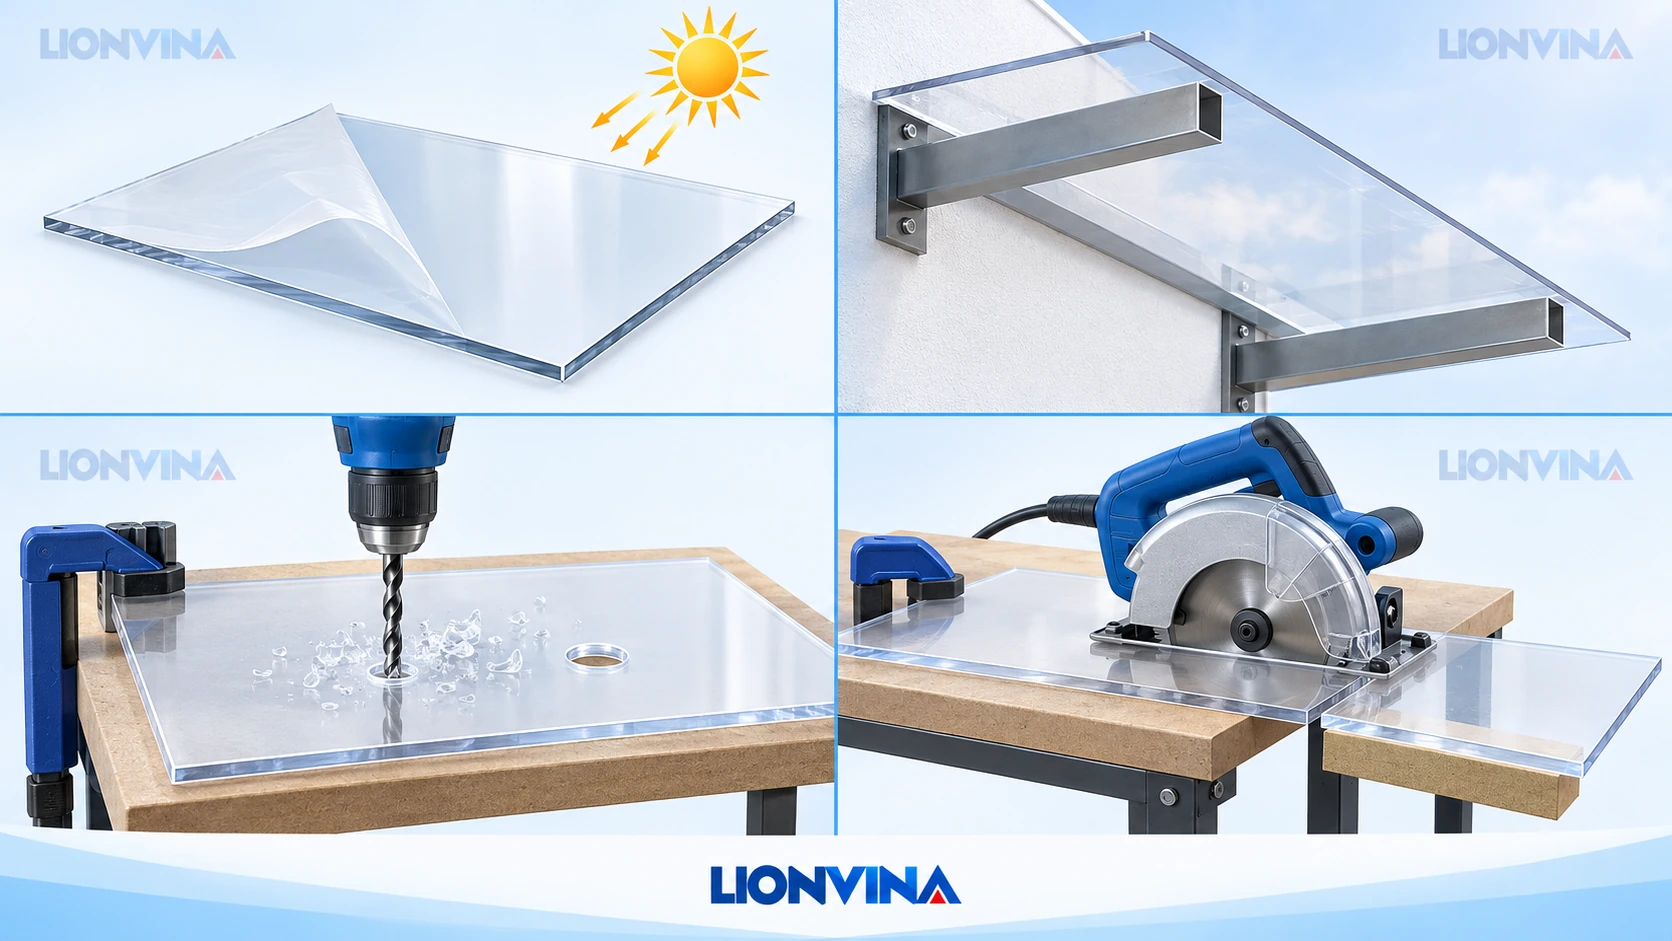
UV Side and Protective Film
Identify the outside face before installation; remove the film according to the sheet instructions.
Supporting Frame and Slope
Confirm support spans and drainage routes before planning sheet layout.
Drilled Holes and Sheet Edges
Drill perpendicular holes if required by the fixing system; use the hole size specified for the sheet model.
Cutting and Cleaning Edges
Support sheets securely, choose a suitable blade and clear swarf after cutting.
Solid Polycarbonate Sheets
The frame and profiles must hold sheet edges securely while allowing movement as temperatures change. Use gaskets and sealants confirmed to be compatible with polycarbonate.
- Allow expansion gaps in both length and width.
- For curved roofs, confirm bending suitability and the minimum radius for the exact sheet model.
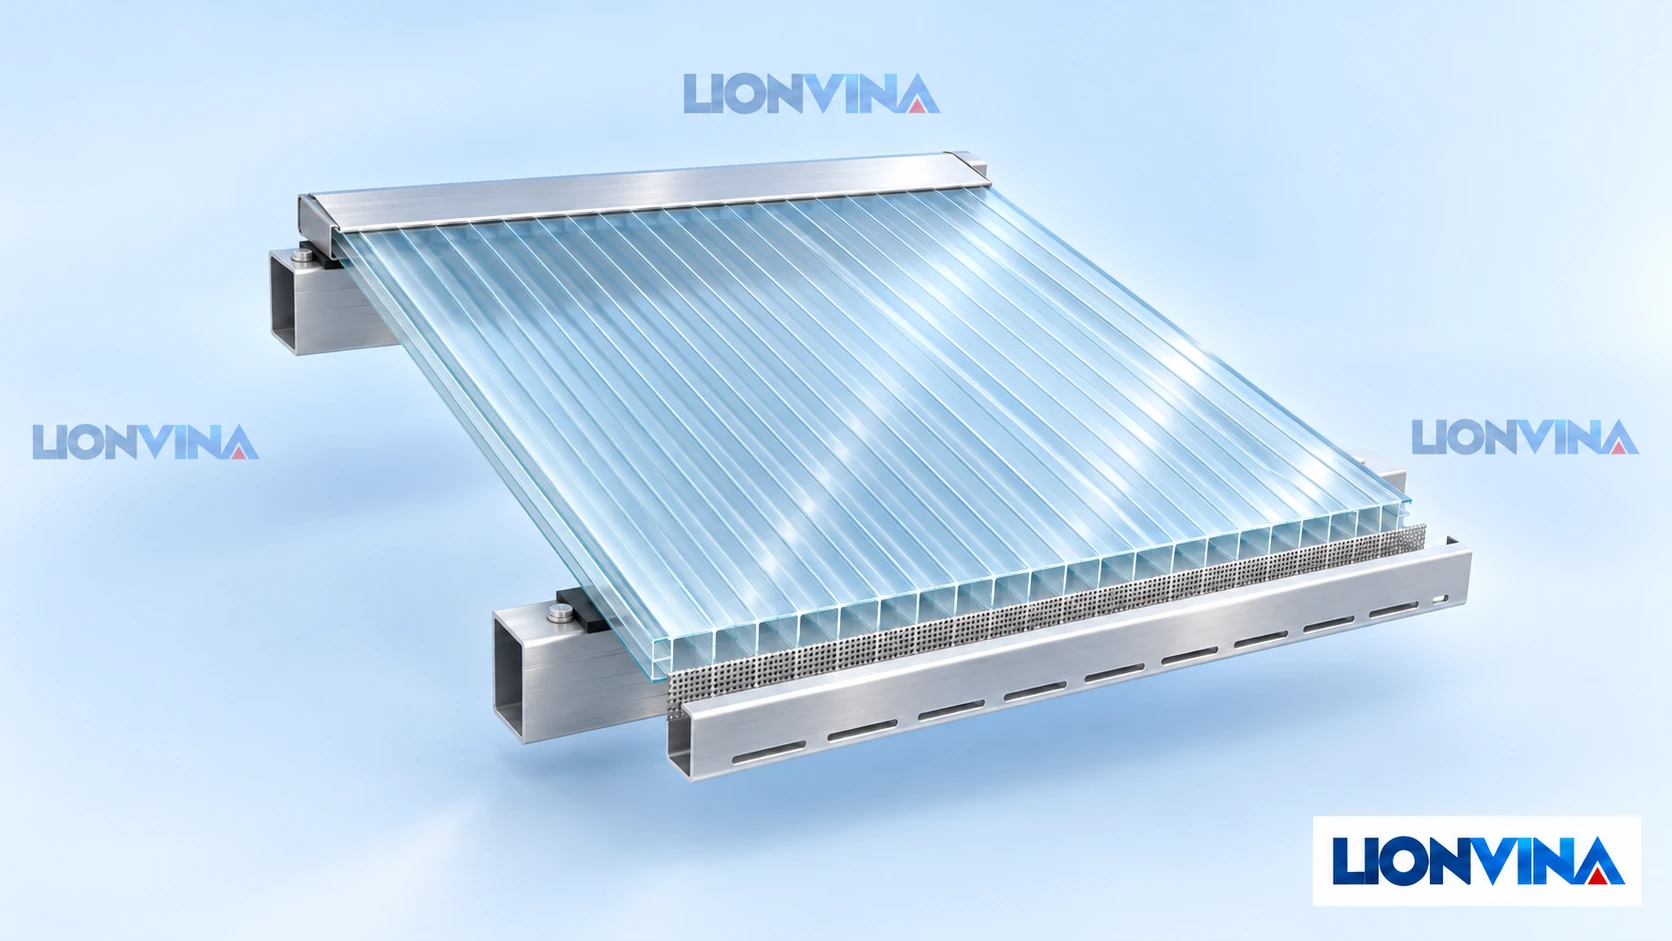
Multiwall Polycarbonate Sheets
On a typical pitched roof, orient the chamber ribs along the slope. Use sealed tape at the upper end and specialised ventilating tape at the lower end, protected by a U profile with drainage provision.
- Remove swarf from the chambers before applying tape.
- Do not seal the lower drainage outlet. For curved roofs with two lower ends, use the tape and profile arrangement specified for the sheet system.
Corrugated Polycarbonate Sheets
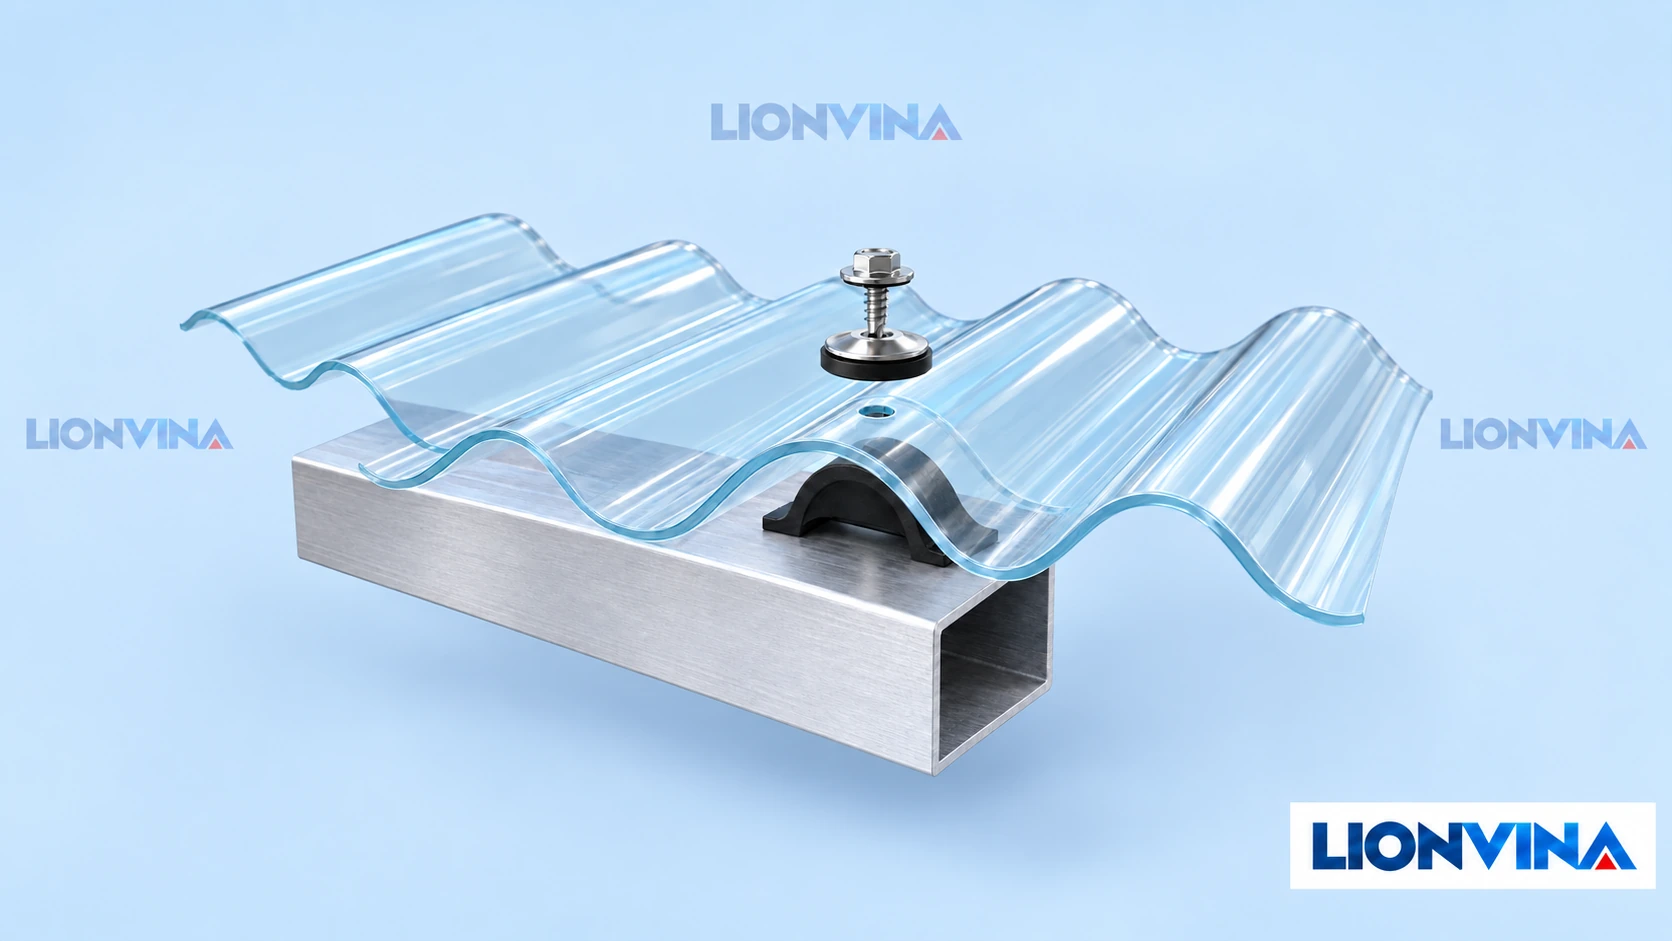
Run ribs along the slope and use accessories suited to the profile. Screw positions, side-lap ribs and end overlaps must follow the product documentation and roof conditions.
- Pre-drill if required by the sheet system's instructions; allow thermal movement at fixings.
- Tighten washers evenly without distorting sheets at screw positions.
Profiles, Accessories & Fixing Details
Select matching accessories and check joints throughout installation.
| Application | Checks to Make |
|---|---|
| Joining and Edge Profiles | Match sheet thickness and the installation system's edge-retention construction. |
| Screws and Washers | Use the correct type for the frame substrate, with compatible washers and suitable tightening. |
| Gaskets and Sealants | Use only materials confirmed suitable for polycarbonate; even neutral-cure silicone requires a compatibility check. |
| Multiwall Sheet End Tape | Combine sealed tape, ventilating tape and protective profiles according to the installation orientation. |
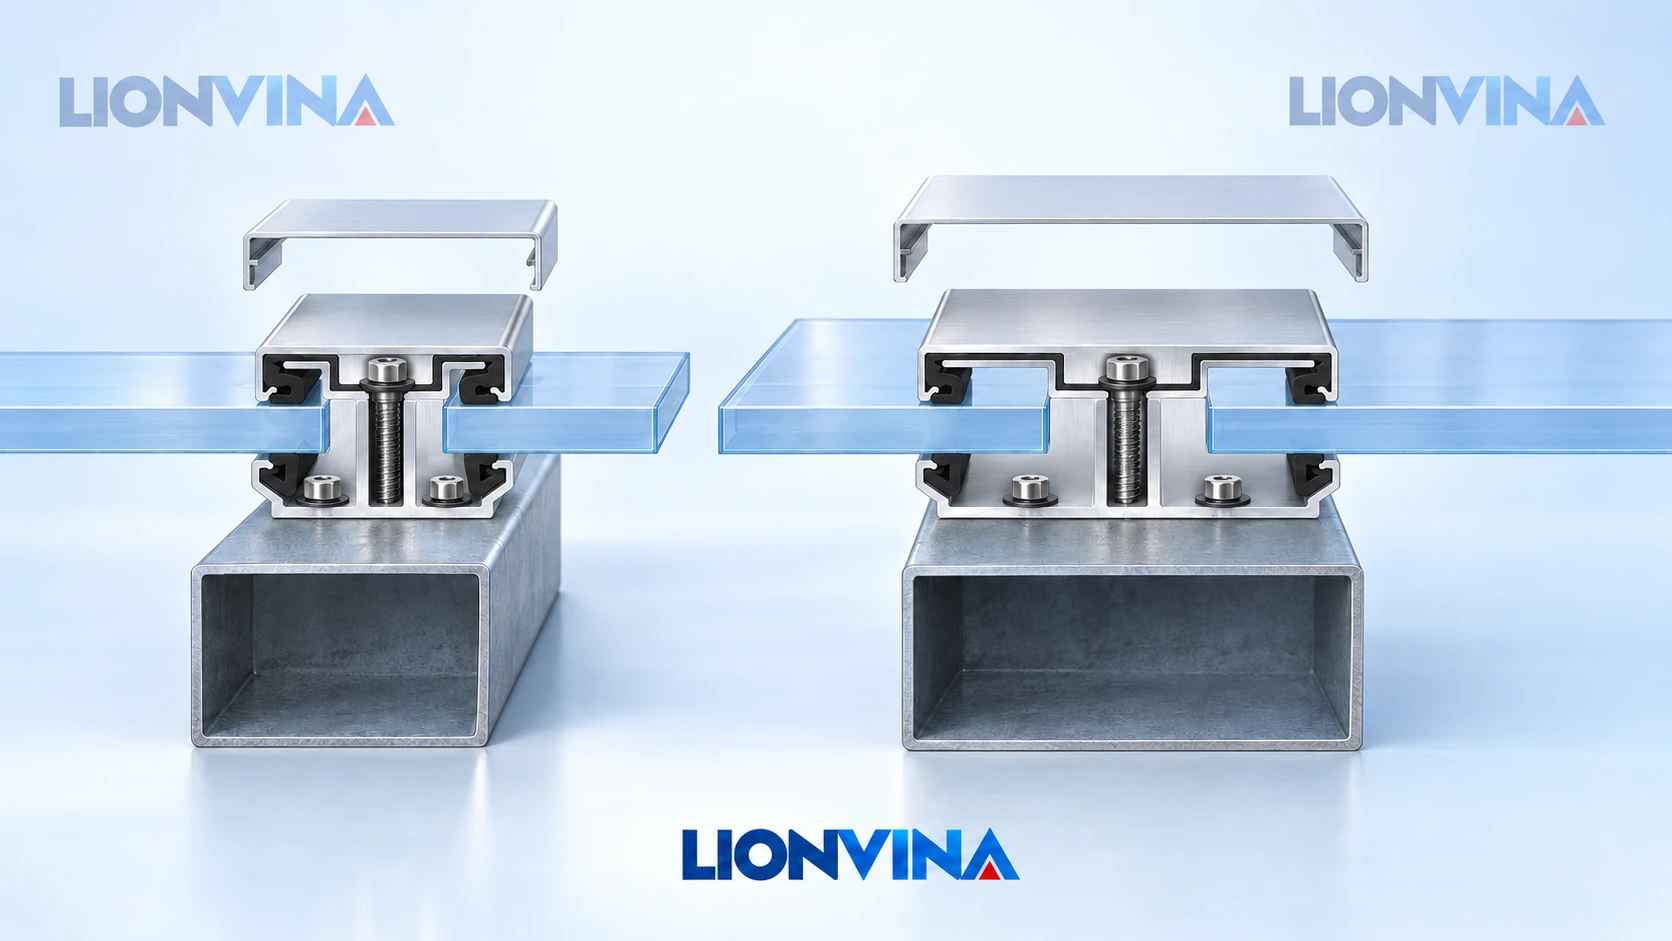
3-Part Snap-Fit Profile: Identify Each Component
The illustrated profile set comprises a T base, M pressure bar and U cover cap. Gaskets sit at sheet-edge contact areas. Check that the set is correct before installation.
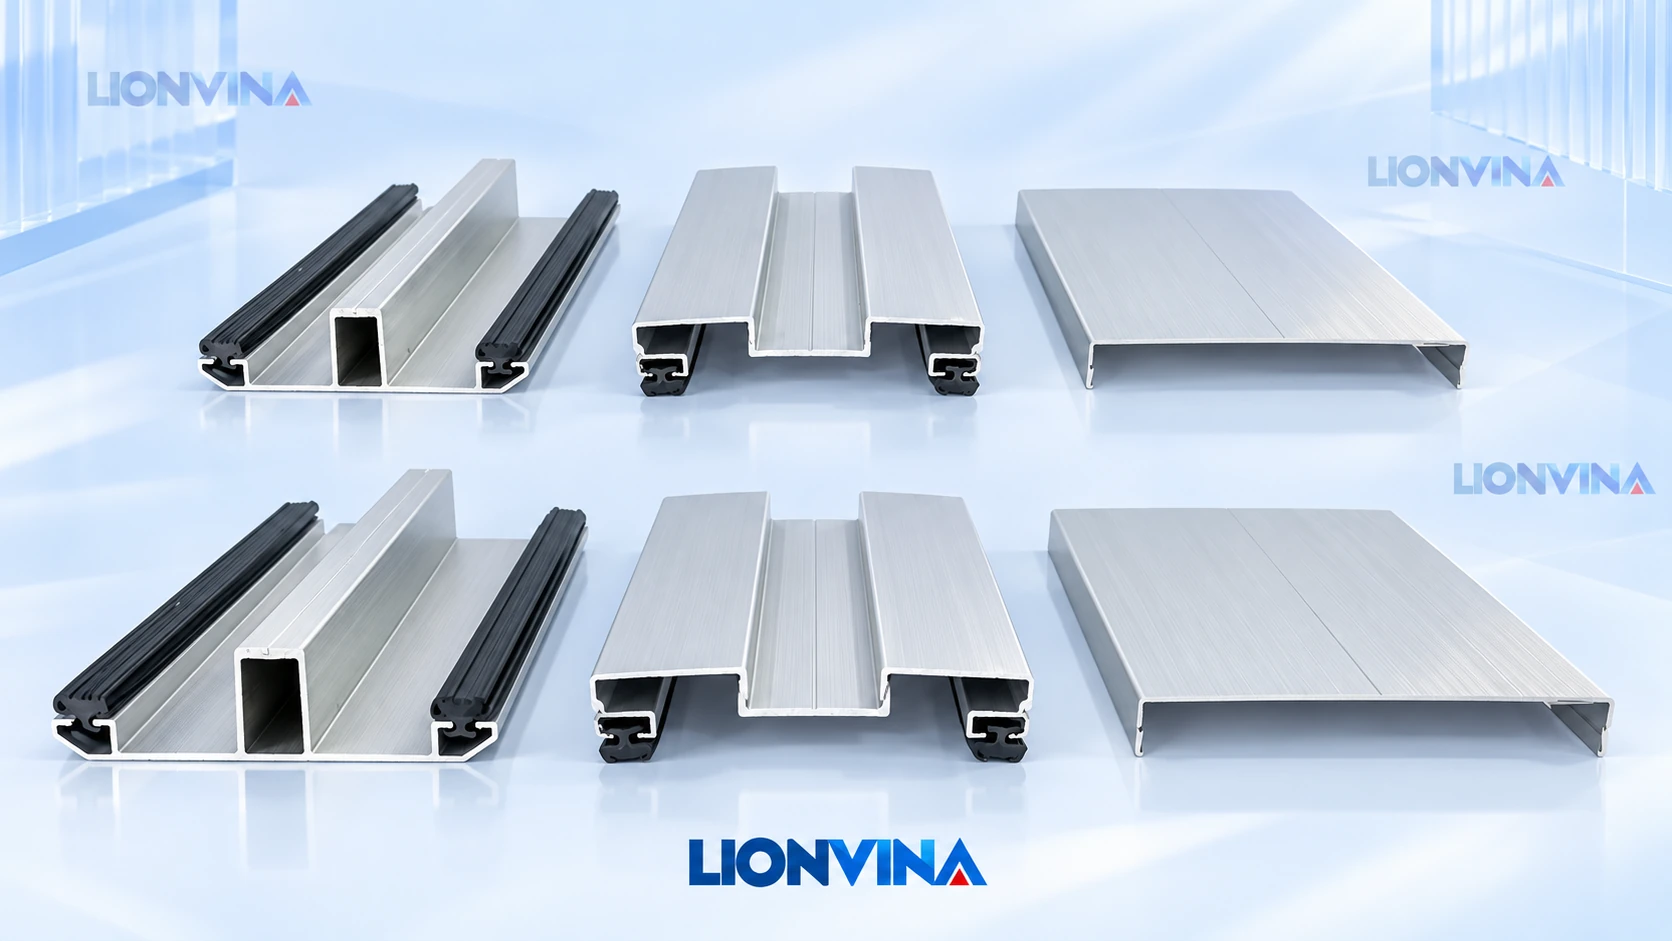
T Base
The lower part of the joint supports both sheet edges.
M Pressure Bar
The upper part holds both sheet edges and has a central screw channel.
U Cover Cap
Covers the pressure bar and screw channel after the fixing has been checked.
Assembly Sequence: Base – Pressure Bar – Cap
The following steps illustrate a joining profile with a base. Check screw locations and fixings against the actual profile set's instructions.
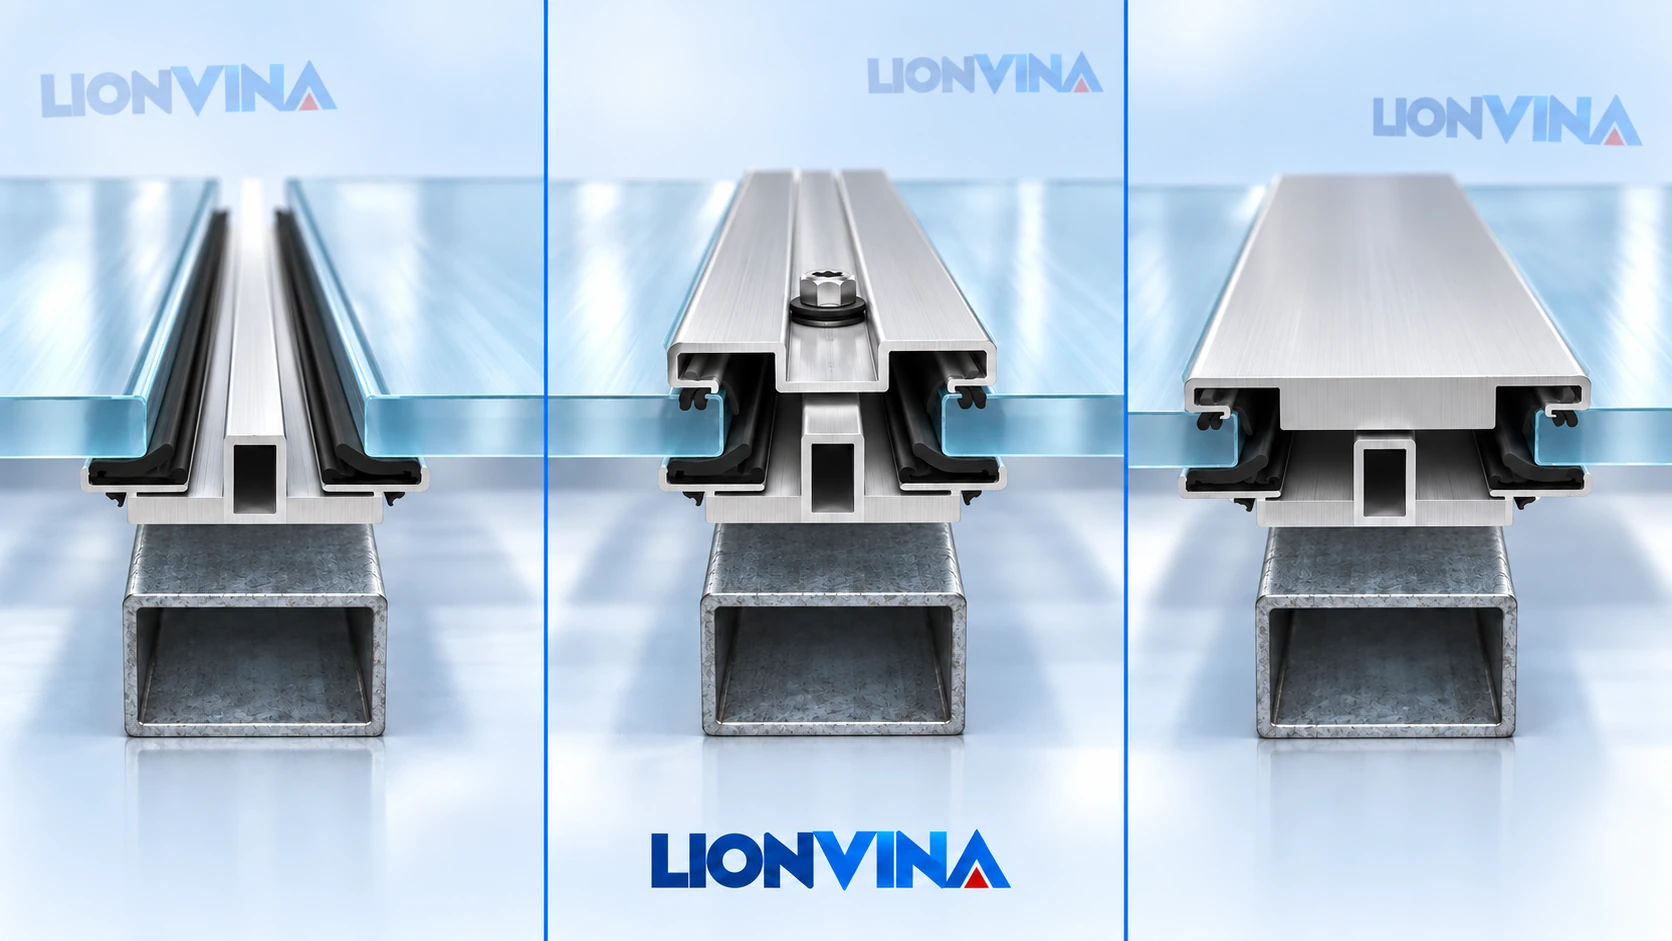
01 · Position Sheets on the Base
Align the base on the supports; place both sheet edges in the gasket areas and allow the confirmed gaps.
02 · Fit the Pressure Bar
Position the pressure bar correctly; fasten through the fixing channel as designed for the set and check tightening.
03 · Complete the Cap
Check the joint, then fit the cover cap; finish the profile ends according to the accessory system.
Screw Fixing Detail at the M Profile
In the illustrated construction, the two sheet edges lie on either side of the central channel. The screw passes through the M bar's fixing position into the support, avoiding penetration through the sheet edges at the joint.
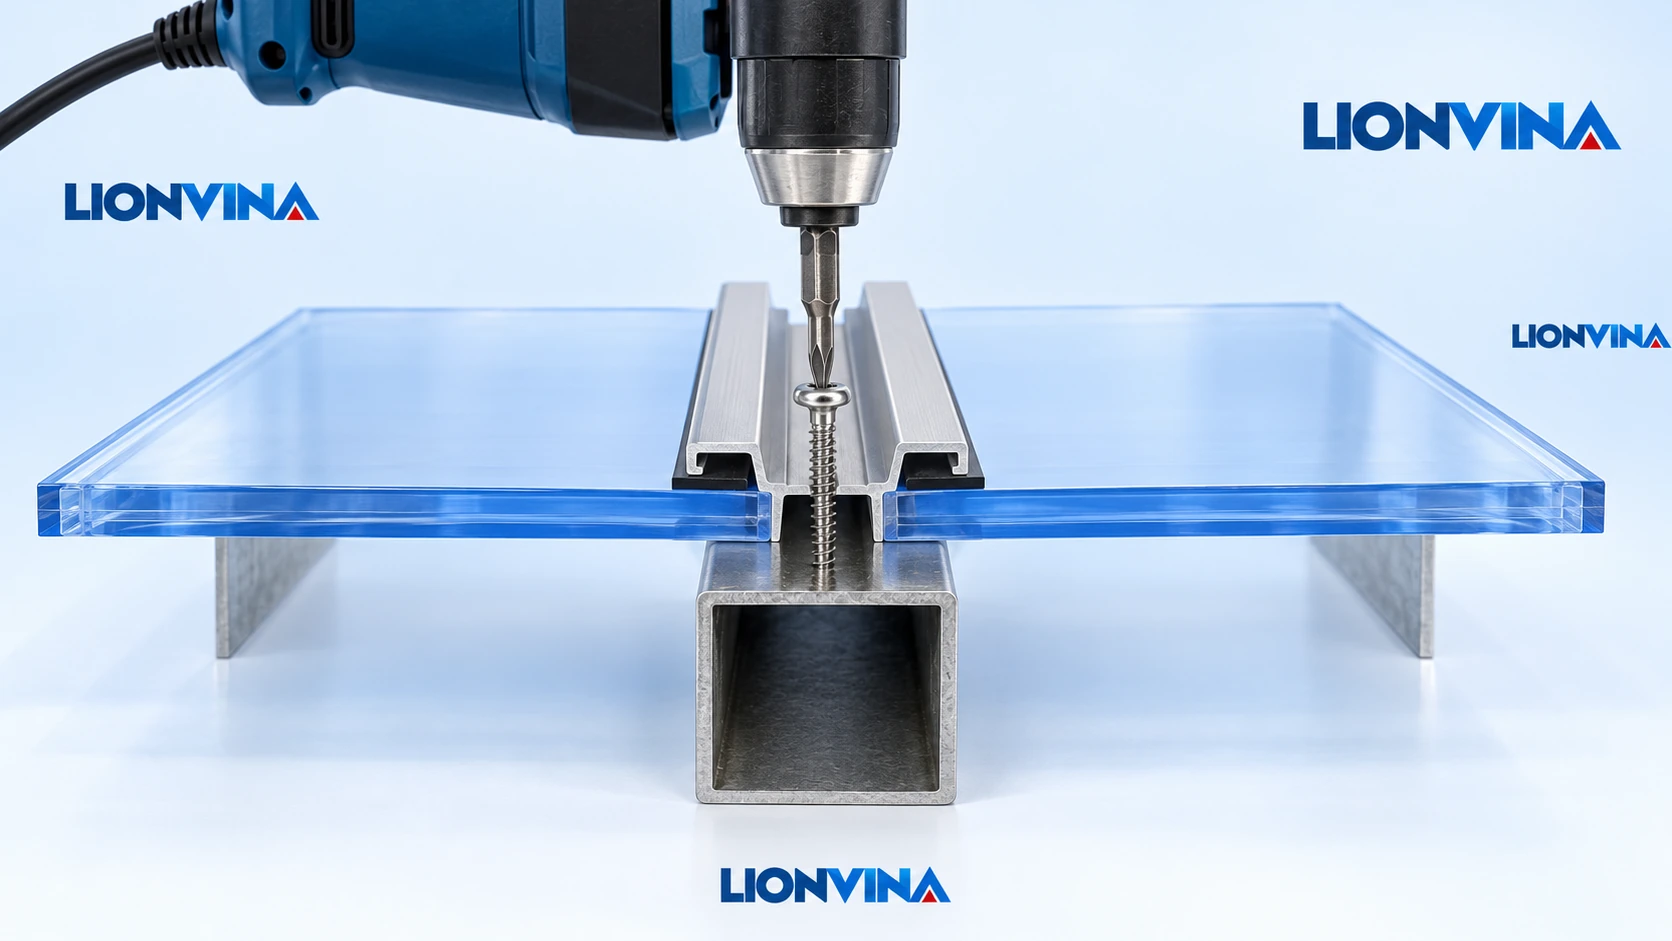
- Align the profile channel with the support beneath it.
- Maintain the gap between sheets according to the profile documentation.
- Do not fill expansion gaps with adhesive where free movement is required.
- Check screw positions and tightening before fitting a cover cap, if present.
See Through-Sheet Fixing and Expansion-Hole Principles Below →
Drilled Holes and Expansion at Through-Sheet Fixings
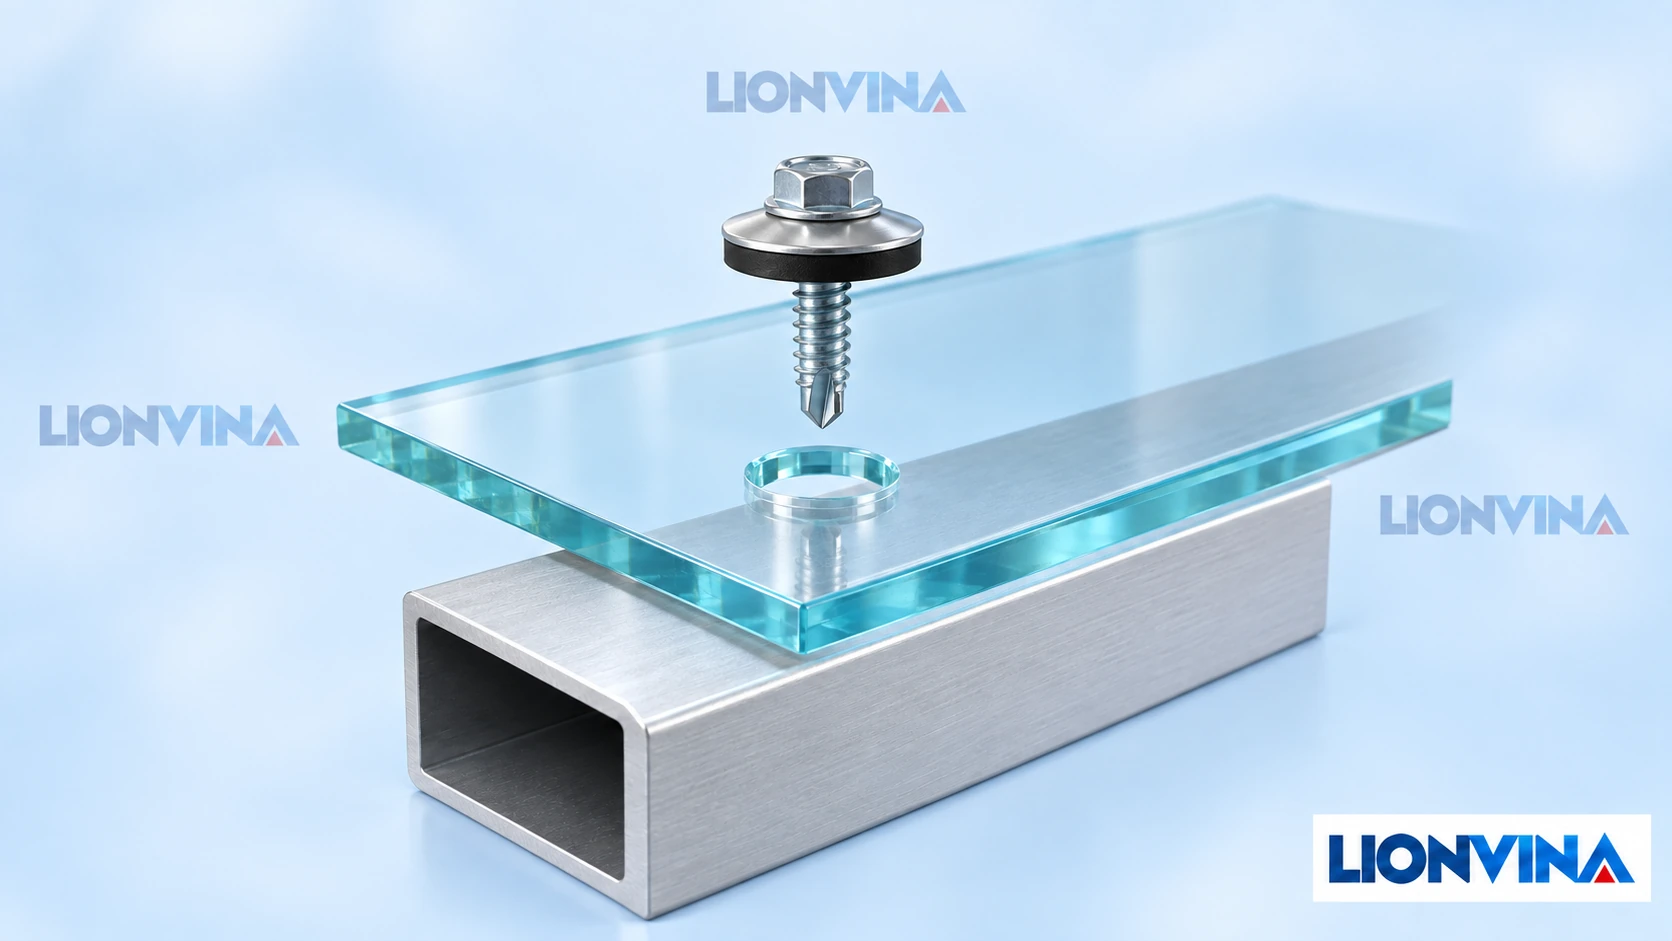
In this construction, the screw passes through a drilled sheet hole with a suitable washer. Hole size, edge distance and tightening must follow the sheet system's instructions. The M profile above shows a fixing through the central channel between two sheet edges.
Check Before Handover
Tick each item after checking the documentation and inspecting the project directly.
Cleaning and Care After Installation
Rinse to soften dirt, use a soft cloth or sponge with a suitable mild cleaner, then rinse with clean water. Avoid dry rubbing, sharp objects, abrasive cleaners and unapproved solvents. Clean when the surface is cool and check gutters and accessories at the same time.
Retain Information for Maintenance
Record sheet codes, specifications, accessories, consulted documents and images of junctions. When assistance is needed, send these with current-condition photos so LIONVINA can discuss the correct project element.
Frequently Asked Questions
What Should the Purlin Spacing Be?
Support spans depend on sheet type, thickness, dimensions, edge retention and project loads. Send the roof plan and sheet model to confirm specifications before installation.
Can One Screw-Fixing Method Be Used for All Three Sheet Types?
Each sheet type and accessory system has its own fixing construction. Check screw positions, drilled holes and washers against the actual installation system.
Should the Protective Film Be Kept on to Prevent Dirt After Installation?
Remove the film at the manufacturer's specified time once installation is complete. Film left in sunlight for too long may adhere firmly and become difficult to remove.
Reference Technical Documents
The documents below help explain installation principles. Each system's specifications apply only to its corresponding product.
Preparing to Install a Daylighting Roof?
Send LIONVINA the roof dimensions, frame type, existing-condition photos and proposed sheet type. We will help select suitable sheets, accessories and installation documents.